Breaking the mark for continuation by Brummie
5+

An overview of how to make continuation throws easier by considering our break mark throws in more detail
Setup
The setup shown here is just an example and reflects a vertical or side stack. You can change the distances and positions to more accurately reflect your offence.
Step 01
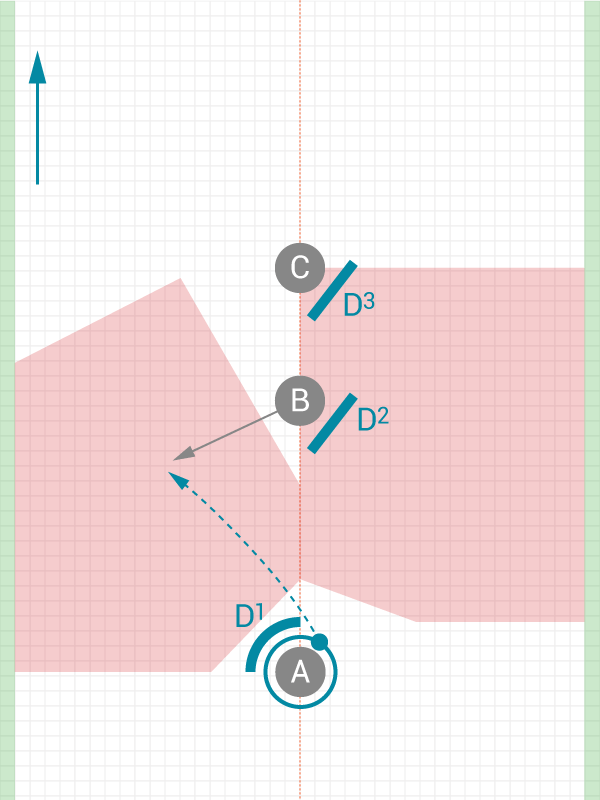
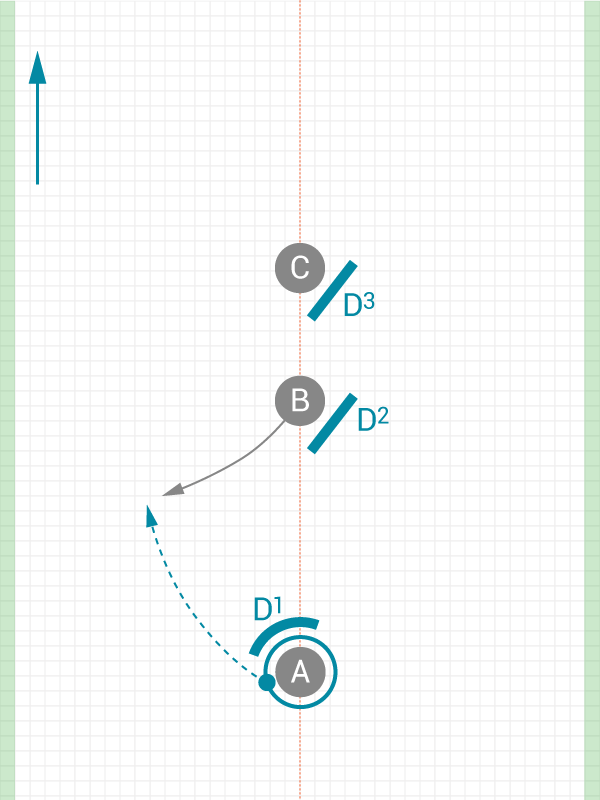
- Fig. 1: A breaks the mark to B
Step 02
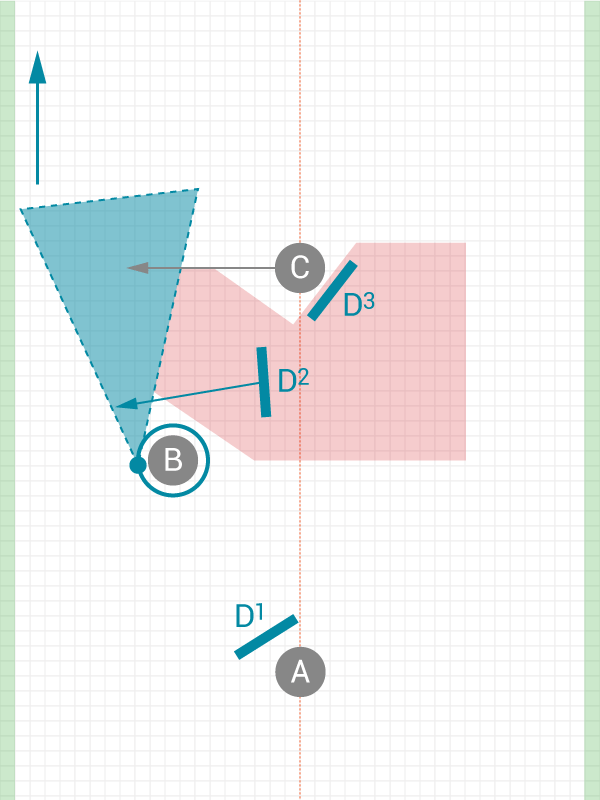
- Fig. 2: After breaking the mark, the downfield defender D2 is out of position; we're looking to exploit this temporary gap in coverage to sneak out a pass to the break side of the field without having to actively break the mark again
Step 03
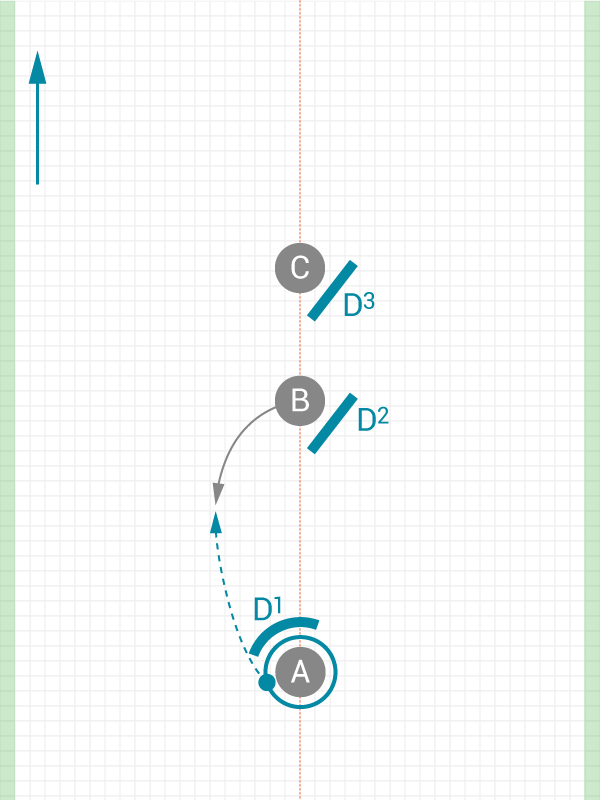
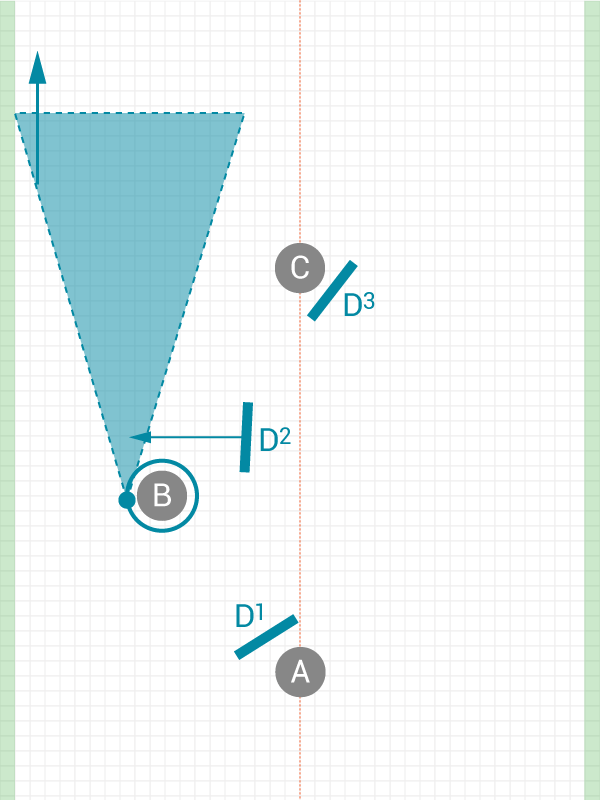
- Fig. 3: A underthrows B, forcing B to turn to attack the disc
Step 04
- Fig. 3a: B catches with back to the continuation cutter C. This makes it more difficult to throw continuation.
Step 05
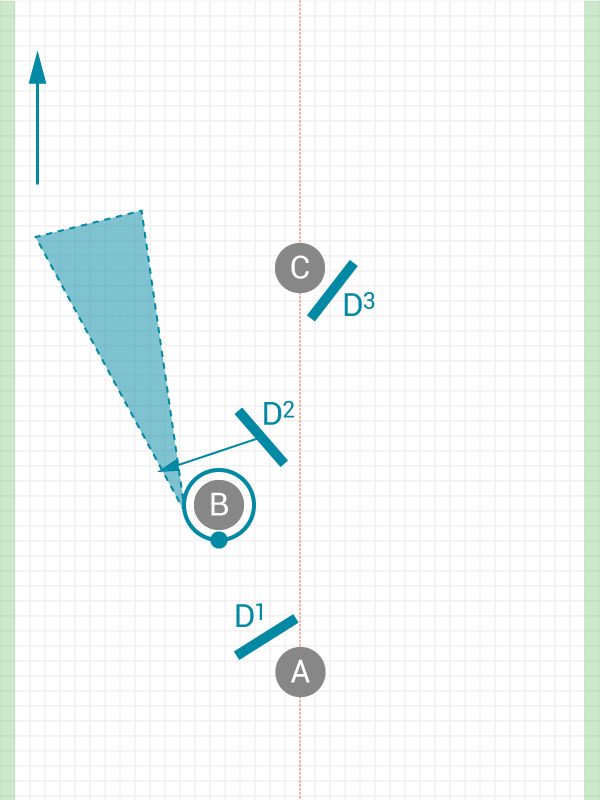
- Fig. 4: A throws wide to B; B turns to make the catch
Step 06
- Fig. 4a: A wider throw makes continuation easier
Please wait while we load the Ultiplays play diagram ...
Pre-requisite drills
None
Tips
Brummie says:
Fig. 1: A breaks the mark to B